How to set the parameters for a subscriber list
After creating a subscriber list in your FreshMail account, it's time to set its parameters.
Setting the parameters of a subscriber list
This might be the easiest thing you do today. Just click the ‘Contact lists’ option in the main menu, select a specific list, and then click the ‘Parameters’ option in the menu on the left.
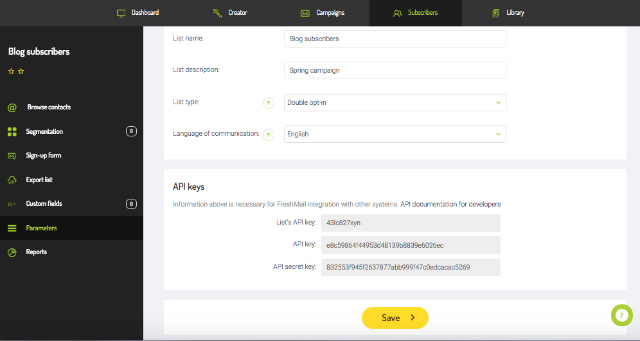
You will be taken to a page where you can edit the name of the list, its description and the type of list it is. Here is some information about the two options available to you in 'List type'. Select the language of communication. Thanks to this it will be easier to set up automatic messages and pages with messages for example signup page.
Double Opt-In
The recommended type of subscriber list is Double Opt-In, which means that after subscribing to your newsletter, the recipient receives an email with an activation link which has to be followed in order to receive further communication from you. With this option, you avoid the problem of sending unwanted mail, wrong addresses and many others.
Single Opt-In
In case you are more concerned with the size of your list, Single Opt-In is typically more effective. Remember that using this option is likely to increase the size of the list at the expense of its quality. Furthermore, it lacks the built-in confirmation of the subscriber's identity and desire to receive your communication that is often required by regulations governing the sending of such messages.
More information about Double-Opt In and Single Opt-In can be found here.
How to set the Double Opt-in in FreshMail?
If you decide to use the Double Opt-In option, as FreshMail recommends, you will be asked to set up the message that will be sent with the activation link. Go to the ‘Sign-up form’ tab and select ‘Confirmation messages’.
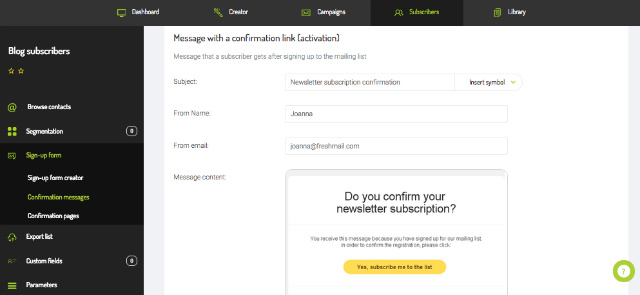
After specifying the sender and the subject, you will see the default text of an email that will be send to your subscribers' mailbox after signing up to the newsletter. It is important that the text contains an explanation of why the person is receiving the message and information regarding the protection of the data entrusted. Try to include the logo of your company, which will make you more credible to the recipient. Also, it's a good idea to remind the recipient that it's possible to unsubscribe from your newsletter as well.
Want to customize your confirmation mail? Fine, just remember -
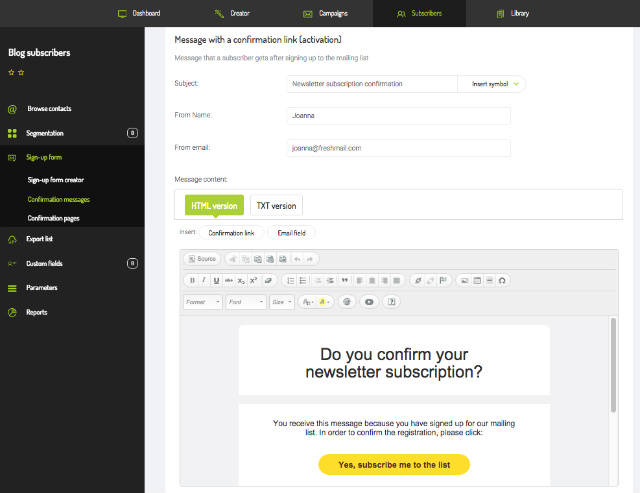
If you choose to create your own text for the confirmation mail remember to enter the tagTagZnacznik stosowany do klasyfikowania fragmentów tekstu. Pozwala na grupowanie odnośników (linków), umożliwia tworzenie grup na podstawie m.in. kliknięć linków oznaczonych za pomocą tagów.: $$confirmlink$$. After sending, it will turn on the activation link.
This message can be prepared in both text and graphic versions (HTMLFormat HTML + TXTWiadomość, która zawiera format HTML i TXT. Programy pocztowe, które nie będą mogły odtworzyć wiadomości w formacie HTML, wyświetlą ją w formacie TXT. Należy pamiętać, że wyświetlenie wiadomości w formacie TXT uniemożliwi zraportowanie jej w kontekście otwarć.).
Trial accounts and confirmation message
If you use a trial account, you can take advantage of the option to edit your confirmation message by contacting our Customer Service. After clicking the ‘Edit’ button a popup will display information to make it easier to contact our consultants, who can insert the new text for you.
You can still change the topic of the message, the sender email and preview your messages before sending.
Welcome message
Why are welcome messages the best place to do this?
Because they are sent automatically after activation of an email address. Moreover, by welcoming your new subscriber you start a dialogue and a relationship in much the same way as you do with someone you have just met. This makes it much easier to keep the relationship going in subsequent stages of your communication with the recipient.
To set up a 'welcome' message, use a specially designed autoresponderAutoresponderAutomatyczna wiadomość wysyłana odbiorcy po kliknięciu w link aktywacyjny. Dotyczy tylko listy Double opt in z autoresponderem.. Using the Sign-up Autoresponder you will be able to prepare your own welcome message.