How to optimise your subscriber lists
There’s a saying among email marketers - “The money is in the list”. Your subscriber database is your primary resource for your email marketing and properly maintaining it should be your highest priority.
Sometimes, however, it’s easy to make simple mistakes that cost you time and money.
Let’s take a look at the ways you can optimise your mailing list and increase the effectiveness your next email marketing campaign.
Why it’s worth regularly updating your database
Taking care of the hygiene of your database brings lots of benefits:
- changing the status of addresses to inactive or bouncing lets you save money on campaigns since you avoid sending your messages to subscribers who are unlikely to ever respond,
- you improve the deliverability of your messages and your reputation as a sender because anti-spamSpamNiechciana wiadomość komercyjna. Zdarza się, że odbiorcy uznają za spam każdy mailing, którego nie chcą już więcej otrzymywać, nawet jeśli wcześniej zapisali się do listy odbiorców. filters will no longer receive information about your unopened messages sent to bad addresses,
- you reduce the risk of having your campaigns blocked in the future by avoiding potential spam traps.
1. Deleting subscriber data from your list doesn’t necessarily mean that you will be able to replace them with others under the terms of your payment plan. These slots are “available” after the end of the accounting period.
2. If you manually delete subscribers outside of FreshMail and then re-import them as a “clean” list, all addresses will be counted towards the total allowed by your plan.
If you exceed the limit of subscribers specified in your payment plan, your account will be blocked until you renew you plan or move to a higher one.
Moving to a different payment plan resets the limits in your account and addresses are re-counted. Unused days from the previous plan will be added to the new one.
Remember that you don’t have to delete addresses and you shouldn’t “clean” your subscriber database this way.
If you do this and you then want to add addresses to a new list, you lose the ability to create segments on the basis of behavioural data from previous campaigns sent to those addresses.
If you don’t want your campaign sent to certain addresses, it’s enough to change their status to deleted, bouncing or resigned. At the end of the 30 day accounting period, you will be able to add new subscribers.
Here’s how to avoid common mistakes whem managing your subscriber database and to optimise your email marketing.
Scenario 1: A campaign produces lots of bounces - change the status of the recipients without deleting them from your lists
After running a campaign, your reports tell you which addresses received your message and which addresses returned hard and soft bounces.
If the statistics say that more than 10% of your messages are bouncing, this is a strong signal that something is wrong. This can happen when:
- you have not sent a campaign in a long time or
- you don’t use the double opt-in model.
You shouldn’t send any more messages to these bouncing addresses since doing so will only have a negative influence on your reputation as a sender.
To ensure that you do not continue to send anything to these addresses but to keep them in your database, follow these steps:
1. Go to the Campaigns/Reports tab.

2. Next, select the campaign that generated the bounces.

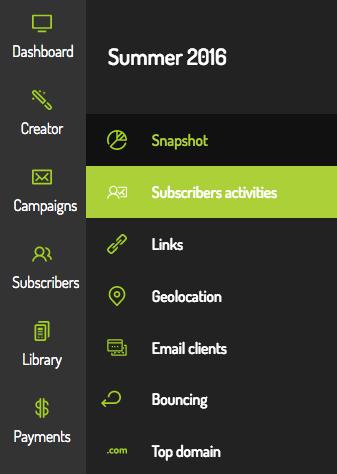
3. Click Subscriber activities from the main menu.
4. Next, export the report results to a file with the help of the green icon on the right.

5. The announcement below informs you that the process is in progress.

6. Please note that import will include all the addresses from list that campaign was sent to (with all the statuses). It is not possible to download bouncing addresses directly from report. You can do it by using a spreadsheet. Arrange the addresses according to their status to create a file consisting of addresses that hard bounced. Then create separate sheet with bouncing addresses.
7. Then go to the subscriber list to which you sent the campaign that produced the bounces.

8. Use the Add subscribers option.

9. Choose the file that you created and import it into the system.

10. In the new window, expand the advanced options.
- In the Set a status for your new subscribers field, select Bouncing hard.
- In the In case of non-unique subscribers field, select change status only according to the one above.
Then click Import.

11. The announcement below tells you that the process is being completed.

Remember that you can change the status of subscribers on any of your lists in FreshMail and when you re-import them, they will not be counted twice.
Clues tell the story
FreshMail recommends that you use the double opt-in model anywhere and everywhere you add subscribers to your mailing lists.
Using this model allows you to be sure that you are adding quality addresses and real subscribers to your database and means that you protect your reputation as a sender by avoiding spamtraps.
If your campaigns generate a significant number of bounces, think about using your account settings to automatically change the status of addresses that bounce.
1. To change these parameters, go to your account settings.

2. From the main menu, select settings for Contact lists.

3. Then change the number of bounces after which the subscriber status will be automatically changed.
In the case of hard bounces, it shouldn’t be more than two.

Scenario 2: You have lots of inactive subscribers on your list - create a segment of subscribers who haven’t opened any of your campaigns.
The fastest way to find subscribers who haven’t opened any of your campaigns - or particular campaigns - is to create the appropriate segment.
You will then be able to import those subscribers while at the same time changing their status to deleted and staying under the subscriber limit allowed by your payment plan.
1. From the main menu, go to the Subscribers tab and select a list. If you want to create a segment from multiple lists, follow these rules for each one.
2. Select Segmentation.

3. Click the Add segment button. If there are other segments already on your list, you will see them at the top of the page.

4. Choose a name for the segment you are creating and in the Create a rule field, select The subscriber did not open any campaigns.

5. When you create a segment, it’s easy to export the addresses it contains.
To do this, just go to the Subscribers tab and select the list in which you created a segment. Then, from the main menu, choose Export list.

6. In the Groups field, expand the export options by clicking the Off button and export only the subscribers from a given segment.

7. Next, import the subscribers from the file to your lists changing only the settings in the fields below:
- In the Set a status for your new subscribers field, select Removed.
- In the In case of non-unique subscribers field, select change status only according to the one above.

Scenario 3: Pay attention to the status of new subscribers
When you create a new subscriber list and there is a possibility that some of the addresses will be repeated on other lists, you can easily take steps to prevent this.
This lets you be sure that addresses that resign from your list or bounce, they will not appear as active on your list again.
When importing a new subscriber list, remember to expand the Advanced import options in the last step, just as when importing addresses in Scenario 2.
Then, set the option for repeated addresses and addresses found on other lists, as shown below.

And you’re done! Following the steps outlined here helps keep your database in good order and allows you to be sure that your email marketing activities are optimised.