Targeting your lists
Database segmenting has never been as simple and effective as it is today. Using an essentially unlimited number of defined extra fields, you can use your collected data to target your mailings in a way that will optimize your response rate.
Let's take a look at how it works by assuming that you're starting a campaign targeted at a certain geographic region.
Getting started
Just click on the 'List of recipients' and choose a specific list then click on the 'Segmentation' option.

Now add a new segment via the 'Add segment' icon in the middle of the screen. You can name it after the area you are targeting in this campaign and then create a command for the custom field called 'county'.
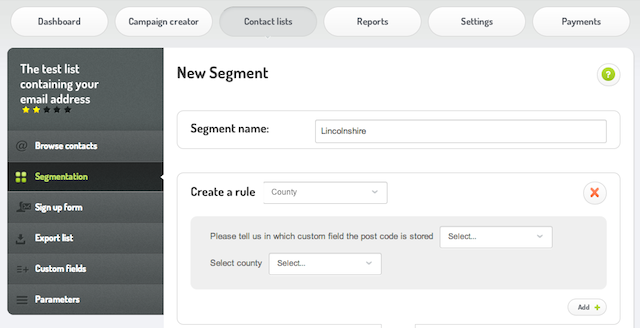
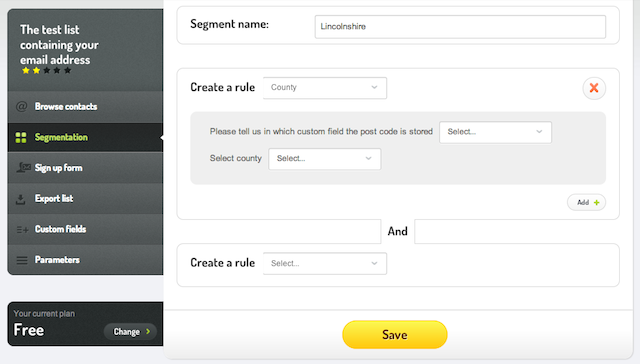
At the next field, just select the command 'is equal to' and type the name of the county – for example 'Lincolnshire'. If you want the command to involve several provinces, you can click the button 'Add'.
When you click 'Save changes' button, the system will save the settings and take you to the previous page. Now by clicking the button with two green arrows, you will learn how many recipients come from Lincolnshire.
Geotargeting recipients
If you do not have this kind of information in your database, you can use the 'Geotargeting' option. Currently each recipient is assigned by country; on the basis of the IP address that was used to confirm the subscription to the newsletter (provided of course that subscription is made using the Double Opt-in model, which we recommend).
Remember, however, that anyone who uses the mobile Internet won't have a local IP address. People who use the ADSL network (Sky, TalkTalk) can be assigned to a neighbouring county, and not necessarily to the one in which they actually are - it depends on the ISP infrastructure in question.
In this case, the principle will be geotargeting of 'Subscribers of the newsletter in the region of…'. When you select it you will see a drop down list with the option to choose a particular countries.
Segmentation base on activity
In addition to the possibility to geotarget your emails on the basis of custom fields, FreshMail gives you the ability to create segments of recipients on the basis of their actions during previous campaigns. For example, you can create segments based on users who :
- opened a previous email
- did not open the email
- opened the email and clicked a link
- opened the email and clicked the link marked as the TAGTagZnacznik stosowany do klasyfikowania fragmentów tekstu. Pozwala na grupowanie odnośników (linków), umożliwia tworzenie grup na podstawie m.in. kliknięć linków oznaczonych za pomocą tagów.
- opened the campaign marked by the TAG
- have not received any mails from you
- opened the email in a given location
The commands needed to create the appropriate segment can be combined in order to best select the recipients of your email message. For geotargeting of shipping you can create combined segments, i.e. use all the information that you have about your recipients.
See an example
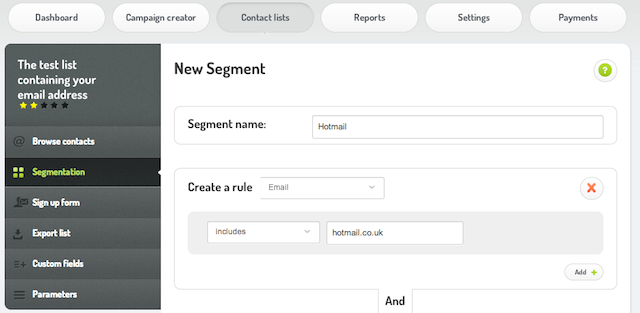
For example, you can create a segment of recipients from the hotmail.co.uk domain, to which you did not send your last campaign. By default, you go in the tab of 'List of recipients', choose a list, and then click the 'Segmentation' option. Now add a new segment, name it 'Hotmail / did not receive campaign 1', so that in the future you know what is in it. In this case you need to create two commands, the first will cover the domain, and the second will concern the new campaign.
Making a segment
Create a command for the 'email' field and click the 'add' button. In the new window, select the 'Contains' option, and type the phrase to the appropriate frame, the one you are interested in. In this case it will be: @hotmail.co.uk.
Then create another phrase under the phrase of 'And'. From the behavioural targeting, choose the option of 'campaign has not been sent'. Choose the campaign that interests you from the drop-down list and click on 'Save changes'.